These purses are so easy to make for many reasons. You can use pretty much ANY fabric. I haven't tried knit yet, but I've used almost everything else and they turn out amazing. Also, you can make them any size and shape you feel like making them! You really can't go wrong as long as you follow the basic techniques of putting it together. Don't be afraid to refer back to the finished pictures if you have any question during the tutorial. Also, if I confuse you anywhere, just leave a comment. I will comment back with the answer!
Supplies need: 1 yard of webbing for handle (or purse handles), 1 yard of embellishments (optional), 1/2 yard of each color of fabric, and any other accessories (closures, etc.) you prefer.

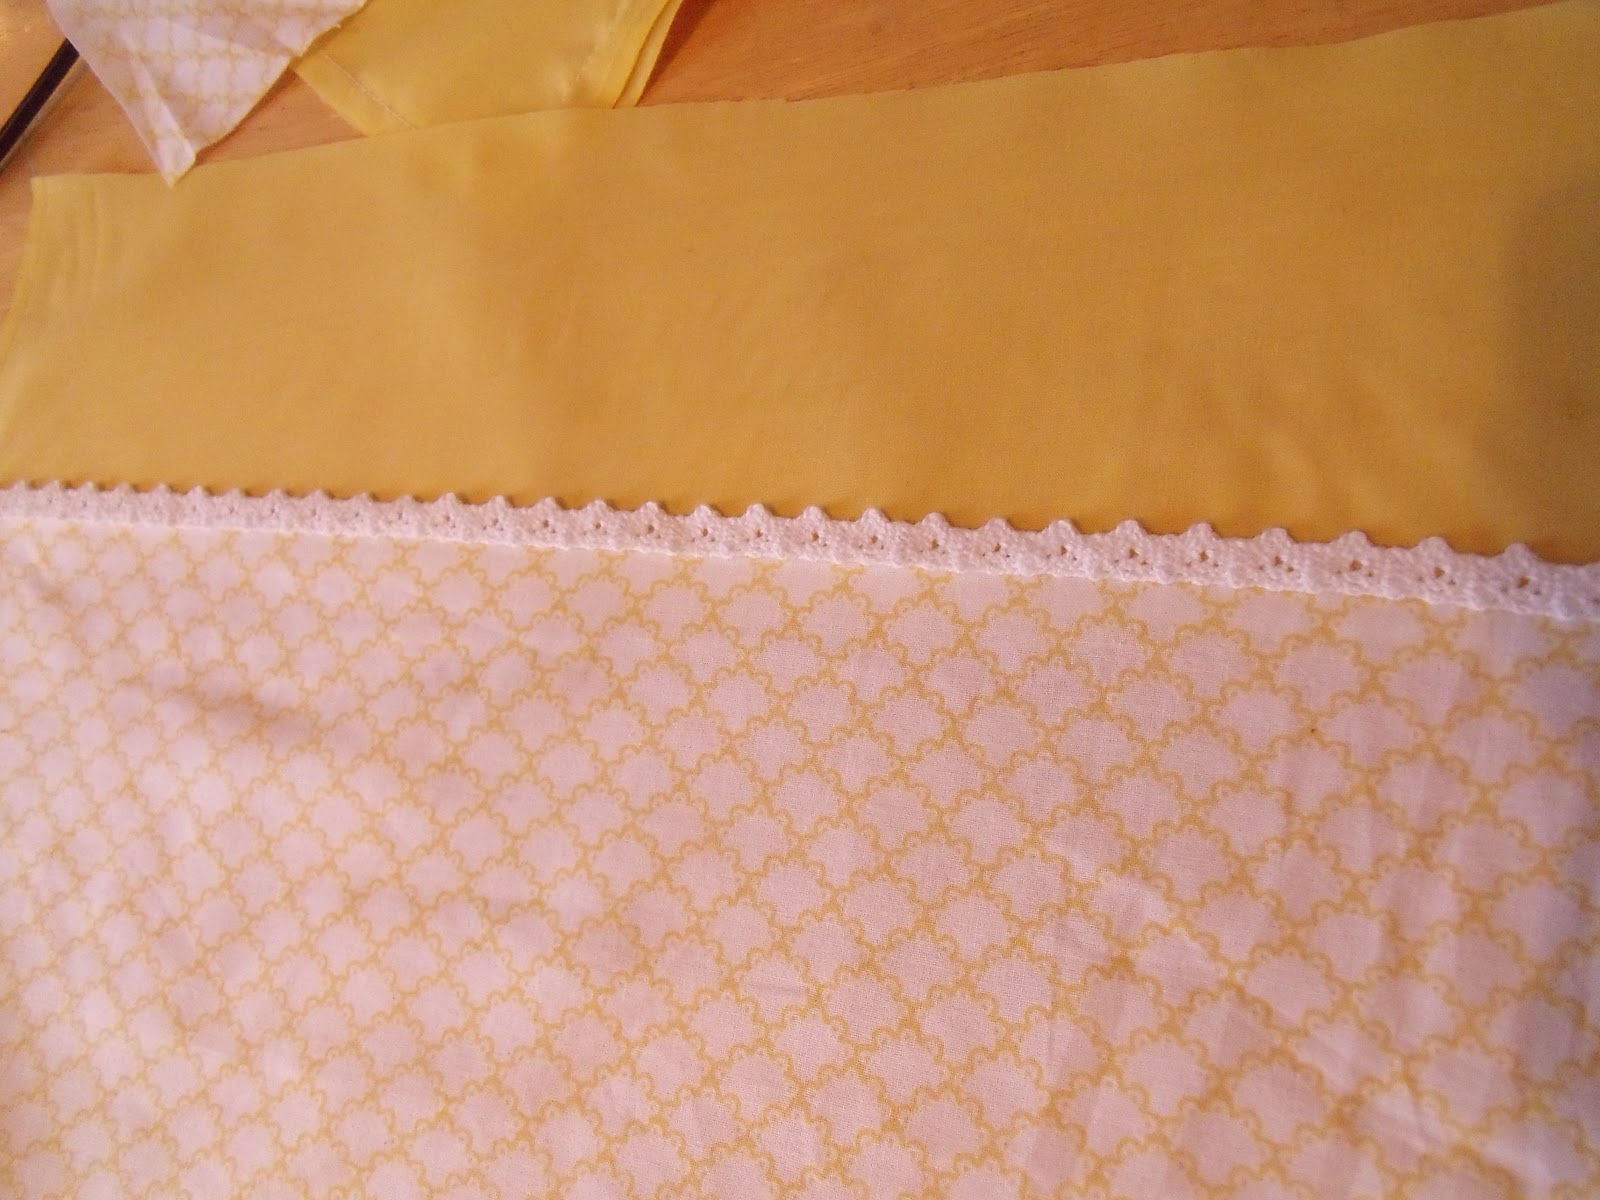
Start by cutting out the size you want the purse to be, leaving an extra half in for stitching. This will be the inside of the purse. Next, Cut a section of the same fabric for the outside, top part of the purse.

Lay the two pieces on top of the outside fabric. Cut the outside fabric to about 1 inch higher than the fabric piece cut out for the top outside edge. This is so when the two pieces for the outside get sewn together, they will be the same size as the inside piece of the purse.

See below how once the three pieces are laid out together, they are the same height and width.

Set those pieces aside, and cut out a double layer of the outside fabric from the leftover scraps. This will be the inside pocket piece.

Put the right sides together of this piece and sew all the way around the edge, leaving a small opening to turn it right side out.


Once its turned right side out, stitch the opening closed.

Sew the pocket to one inside piece, leaving the top open. (Yes...I needed to state the obvious. The first one I made, I forgot to do it.)

Put the two inside pieces together, right sides facing each other, and stitch around the sides and bottom. (Make sure your pocket is facing up when determining bottom from top. Again, learned this one from experience.)

Leave about a 3" opening on the bottom. This will be used after sewing the inside and outside together.

Set the inside of the purse aside and grab your outside pieces. Put the right sides together and stitch across the top on both sections.

Iron them flat if they won't lay flat for you.

Lay your embellishment across the seam. You can play with this a lot. You can center it across the seam, stitch it above or stitch it below. Just lay it out and see how YOU like it!
After that is stitched on, place your two pieces right side together, line up your seams and stitch around the sides and bottom.

Grab the bottom corner and fold the seams the opposite way, so that the seams touch each other, rather than the front and back fabrics. Stitch across the seams, to form a triangle on each corner. Do this for both the inside and outside pieces.


Leave the inside of the purse with the seams showing. Turn the outside of the purse right side out and slide into the inside of the purse. This is where I always have to make sure I'm not distracted. Its really easy to get confused here. I've pulled out the seam ripper many of times on this step!

Tack the two side seams together to keep the pieces from moving around on the next step. Take your closure... (on this purse, its just two pieces of binding sewn in for ties. On the blue purse, I looped the bind to form a hook for the button closure.) and pin it into the center of the purse. You will want to pin one between the inside and outside layers on each side, stuffing the string down between the two layers. (If you can see it while your sewing, its pinned the wrong direction.)

Now place the handles where you would like them to fall on the purse. Again, make sure they are down between the two layers or they won't be very useful after you flip the bag right side out. You can see in the picture below how they are pinned in.

Sew all the way around the top of the bag, so that when you are finished it looks really ugly, but still could be called a 'bag' at this point.

Find that hole at the bottom of the bag and pull everything through it. This is what it will look like after its turned right side out.

Now your last step is to stitch that inside hole closed.

Tuck the inside into the bag and your done.

The kids enjoyed modeling it.

I'm truly glad he doesn't know how to hold a purse.


Here's what the inside looks like.

Now ready for your surprise? (It truly was a surprise to me when I realized it!) YOUR BAG IS REVERSIBLE!!!

Here's what I used for the blue purse.


and the inside. To make a button closure reversible, just sew a button to the inside as well.


Happy Crafting and any questions....just ask!
I Love the yellow one even more now!!!
ReplyDeleteThese are adorable sarah!!!
ReplyDeleteThese are CUTE!! I'm a sucker for zebra print! :) We would love for you to link this at Fancy This Fridays tomorrow! :) http://trulylovelywiththelaneysisters.blogspot.com
ReplyDeleteGreat tute. These are adorable...
ReplyDeleteThanks for linking up last week &
Hope to see you back this week at Creative Juice Thursday
<3
Nicolette